How to Garbage Disposal Installation?
Installing a garbage disposal unit is a practical and efficient way to manage kitchen waste, providing convenience and contributing to a cleaner environment. However, the installation process can be daunting for those unfamiliar with plumbing and electrical work. In this comprehensive guide, we will walk you through the step-by-step process of how to install a garbage disposal unit with authority and precision.
Gather the Necessary Tools and Materials
Before diving into the installation process, ensure you have all the required tools and materials. These typically include a screwdriver, plumber’s putty, a hacksaw, a wrench, a bucket, and the garbage disposal unit itself. Additionally, it’s crucial to turn off the power supply to the area where you’ll be working to avoid any accidents.
Remove Existing Plumbing and Disconnect Power
If replacing an old garbage disposal or installing one for the first time, start by disconnecting the existing plumbing and power supply. Use a wrench to disconnect the P-trap and any other connections to the sink’s drain. Be sure to have a bucket handy to catch any residual water in the pipes.
Next, locate the electrical power source for the garbage disposal and turn it off. It’s essential to prioritize safety during this step to prevent electrical shocks or accidents.
Remove Old Garbage Disposal
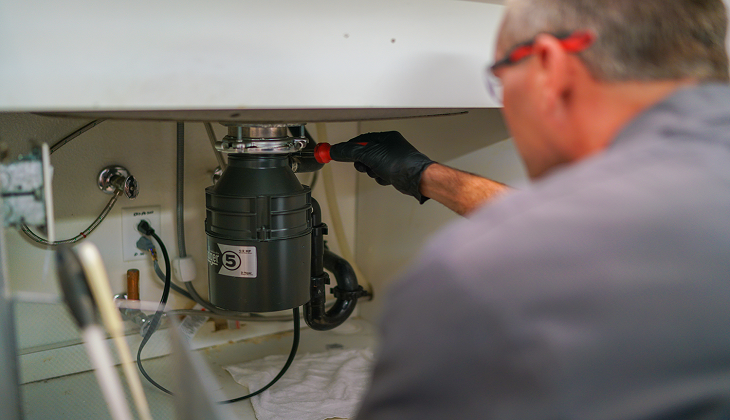
If you are replacing an existing garbage disposal, carefully remove the old unit by loosening the mounting ring and twisting the disposal off the sink flange. Be cautious as the old unit may still have some residual water inside.
Install Mounting Assembly
Start the installation process by attaching the mounting assembly to the sink flange. This typically involves securing the mounting ring with screws and ensuring a snug fit. Follow the manufacturer’s instructions closely to guarantee a proper installation.
Connect the Disposal Unit
With the mounting assembly in place, connect the garbage disposal unit to the sink flange. Most units have a twist-on design that simplifies this step. Ensure a tight connection to prevent leaks.
Connect the Dishwasher Drain
If your garbage disposal unit accommodates a dishwasher, connect the dishwasher drain hose to the disposal unit. This connection allows food particles from the dishwasher to be efficiently ground up and disposed of.
Connect the P-Trap and Drain Pipes
Reconnect the P-trap and other drain pipes, ensuring a secure fit. Use plumber’s putty around the connections to create a watertight seal. Tighten all nuts and connections with a wrench.
Test the Installation
Before restoring power to the garbage disposal, conduct a thorough test to ensure everything is properly connected and functioning. Run water through the disposal while it’s turned on to check for leaks and proper drainage.
Restore Power
Once you’ve verified that the installation is successful, restore power to the garbage disposal unit. Double-check that all connections are secure before using the disposal regularly.
Conclusion
Installing a garbage disposal unit may seem like a challenging task, but with the right tools, materials, and a methodical approach, it becomes a manageable DIY project. This comprehensive guide has walked you through the step-by-step process, providing authoritative insights to help you master the art of garbage disposal installation.
Remember, if you ever feel uncertain or uncomfortable during any step of the installation process, it’s advisable to seek professional assistance. With a properly installed garbage disposal, you can enjoy the convenience of efficient waste management in your kitchen, contributing to a cleaner and more organized living space.